Now Reading: How to Make Perfect Oven-Baked Chicken Cutlets – A Step-by-Step Tutorial
- 01
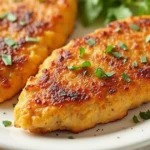
How to Make Perfect Oven-Baked Chicken Cutlets – A Step-by-Step Tutorial
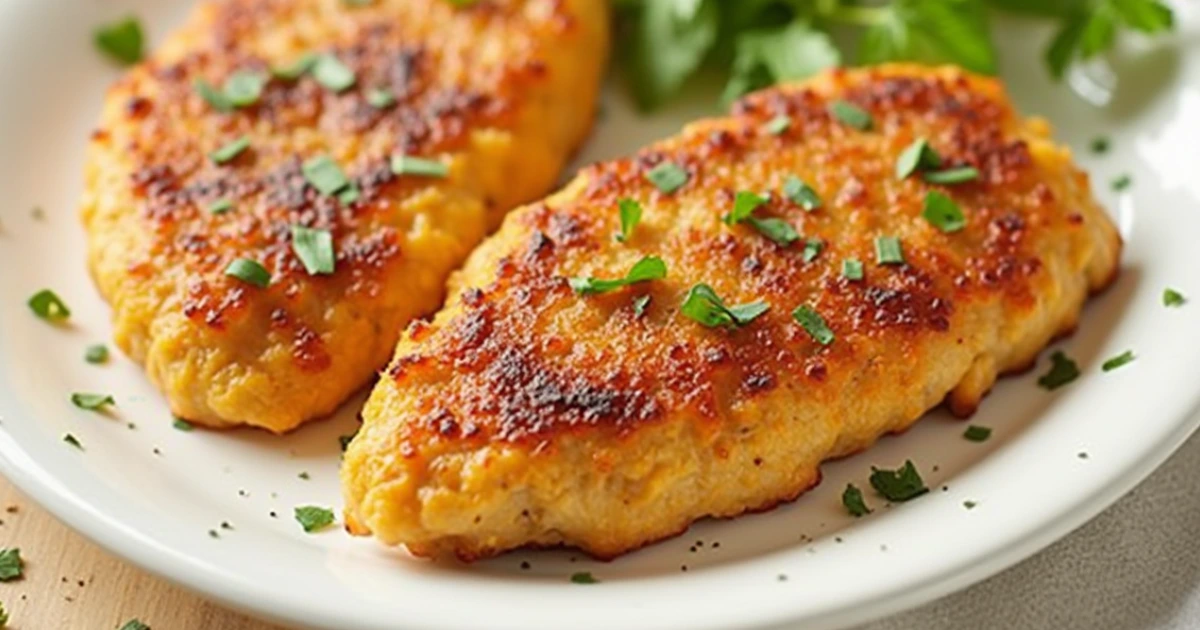
Table of Contents
Imagine coming home after a long day when the comforting aroma of golden, crispy chicken cutlets fills your kitchen. You can almost feel the warmth and satisfaction of a well-cooked meal enveloping you in a cozy embrace. If you’re searching for a healthier yet utterly delicious dinner option that feels like a reward for your hard work, you’re in the right place. This tutorial will guide you step by step through the process of making perfect oven-baked chicken cutlets—helping you transform your routine dinner into an extraordinary experience.
In this article, you’ll discover why oven-baked chicken cutlets have become a beloved alternative to traditional fried versions, learn which ingredients and tools you’ll need, and follow our detailed guide to create a meal that is both nutritious and satisfying. So grab your apron, get comfortable, and let’s embark on this culinary adventure together.
Introduction
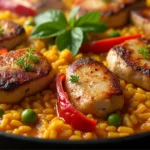
Oven-baked chicken cutlets offer a wonderful blend of health and flavor without compromising on the crispy texture you love. By baking rather than frying, you significantly reduce the oil content while still achieving a golden, crunchy crust that enhances the natural taste of the chicken. This tutorial is designed to walk you through every step—from selecting the best ingredients to mastering the techniques that ensure a perfect outcome every time.
Key Benefits:
- Healthier Alternative: Lower in calories and fat compared to fried chicken.
- Ease of Preparation: Simple steps that even a beginner can follow.
- Versatile Recipe: Ideal for weeknight dinners, meal prepping, and creative adaptations.
Why Choose Oven-Baked Chicken Cutlets?
When it comes to balancing flavor with health, you have a lot to gain from choosing oven-baked chicken cutlets. Let’s explore the advantages:
Health Benefits
- Reduced Calories and Fat: By baking your chicken cutlets, you minimize the amount of oil absorbed during cooking, leading to a lighter dish. Studies have shown that baked dishes can have up to 50% fewer calories compared to their fried counterparts.
- Nutrient Retention: Baking helps preserve the essential nutrients in the chicken, allowing you to enjoy a protein-packed meal without sacrificing vitamins and minerals.
- Better for Your Heart: Lower oil content means less saturated fat, making this a heart-friendly option for those mindful of their cardiovascular health.
Ease and Convenience
- Simple Techniques: You don’t need advanced culinary skills to make this recipe work. The process is straightforward, with clear, step-by-step instructions that ensure success.
- Minimal Cleanup: With no messy oil splatters or greasy pans, you can spend more time enjoying your meal and less time cleaning up.
- Quick Cooking Time: Thinly sliced or pounded chicken cutlets cook rapidly, making this an ideal recipe for busy weeknights.
Versatility in the Kitchen
- Multiple Serving Options: Enjoy your cutlets on top of a fresh salad, tucked into a sandwich, or served alongside your favorite pasta dish.
- Meal Prep Friendly: These cutlets store well in the fridge, making them perfect for preparing several meals in advance.
- Recipe Adaptability: Customize the flavor by experimenting with different herbs, spices, and even cheese to suit your taste preferences.
Ingredients and Equipment
Before you begin, it’s essential to gather all the necessary ingredients and equipment. This preparation will ensure your cooking process is smooth and enjoyable.
Essential Ingredients
For the best results, use high-quality, fresh ingredients. Below is a table outlining the core components of this recipe:
| Ingredient | Quantity | Notes |
|---|---|---|
| Chicken cutlets | 2 pounds | About 8 thin pieces (boneless, skinless) |
| All-purpose flour | 1 1/4 cups | For dredging |
| Eggs | 2 large | Beaten thoroughly |
| Panko breadcrumbs | 1 1/2 cups | Use gluten-free if preferred |
| Grated Parmesan cheese | 1/2 cup | Adds flavor and extra crunch |
| Garlic powder | 2 teaspoons | Enhances taste |
| Salt & Pepper | To taste | Season each layer |
| Olive oil spray | As needed | For extra crispiness |
Necessary Equipment
Ensure you have the following tools on hand to streamline the cooking process:
- Oven and Baking Sheet: A rimmed baking sheet with a wire rack is ideal for even cooking.
- Meat Tenderizer or Rolling Pin: Helps pound the chicken to a uniform thickness.
- Three Shallow Bowls: One each for flour, beaten eggs, and the breadcrumb mixture.
- Cooking Thermometer: To verify the chicken reaches a safe internal temperature of 165°F.
- Plastic Wrap: For pounding the chicken safely without splatter.
Step-by-Step Preparation and Baking Process
Follow these detailed steps to create your perfect oven-baked chicken cutlets. Each phase of the process is crucial to achieving that irresistible, crispy exterior and tender interior.
Prepping the Chicken
Slicing and Pounding
- Slice the Chicken: Lay the boneless, skinless chicken breasts on a cutting board. Using a sharp knife, slice each breast in half horizontally. This creates thinner pieces that cook faster and more evenly.
- Pound to Even Thickness: Place the sliced chicken between two layers of plastic wrap. Using a meat tenderizer or rolling pin, gently pound each piece until it reaches an even ¼-inch thickness. Uniformity is key to avoid uneven cooking.
- Pat Dry: Before moving to the next step, use paper towels to pat the chicken dry. Removing excess moisture is essential for achieving a crispy coating later on.
Key Tip: A well-pounded, dry cutlet will form a better bond with the flour and breadcrumb mixture, resulting in a superior texture.
Setting Up the Dredging Station
Organize your workstation with three shallow bowls, each containing a different component of the coating process.
Organizing Your Bowls
- Bowl 1 – Flour: Add 1 1/4 cups of all-purpose flour and season lightly with salt and pepper.
- Bowl 2 – Egg Wash: Beat 2 large eggs thoroughly in a separate bowl.
- Bowl 3 – Breadcrumb Mixture: Combine 1 1/2 cups of panko breadcrumbs, 1/2 cup of grated Parmesan cheese, and 2 teaspoons of garlic powder. You can add dried herbs like parsley or thyme here if desired.
Step-by-Step Coating
- Dredge in Flour: Coat each chicken cutlet lightly in the seasoned flour. Shake off any excess.
- Dip in Egg Wash: Submerge the floured cutlet in the beaten eggs, ensuring both sides are covered.
- Press in Breadcrumbs: Place the cutlet into the breadcrumb mixture. Press firmly on both sides so the breadcrumbs adhere evenly.
Bullet List of Steps:
- Dredge → Dip → Press
- Ensure an even coating for maximum crunch.
Baking the Chicken Cutlets
With your chicken prepared and coated, it’s time to bake.
Preheat and Arrange
- Preheat Your Oven: Set your oven to 400°F. Position a wire rack on a rimmed baking sheet to allow hot air to circulate beneath the chicken.
- Prepare the Baking Sheet: Lightly spray the wire rack with olive oil spray. This prevents sticking and enhances crispness.
Baking Timeline
- Initial Bake: Place the coated chicken cutlets on the wire rack in a single layer. Bake in the lower part of the oven for 15 minutes. This lower rack position helps to crisp the underside.
- Flip and Finish: After 15 minutes, carefully flip each cutlet. Continue baking for an additional 5 to 8 minutes, or until the internal temperature reaches 165°F. Use a cooking thermometer to ensure safety.
- Optional Broil: If you prefer extra browning on the top, move the baking sheet to a higher rack and broil for 1 minute. Watch carefully to avoid burning.
Data/Sources: Always refer to food safety guidelines from reputable sources like the USDA for correct internal temperatures (165°F for chicken).
Expert Tips for Perfect Cutlets
Even with a great recipe, a few insider tips can make a world of difference. Here’s how to take your baked chicken cutlets to the next level.
Achieving the Crispy Crust
- Pat Dry the Chicken: Moisture is the enemy of crispiness. Be sure your chicken is thoroughly patted dry before coating.
- Use a Wire Rack: Baking on a wire rack allows heat to circulate around the chicken, ensuring the underside gets crispy rather than soggy.
- Olive Oil Spray: Lightly misting the cutlets with olive oil spray before baking enhances the golden-brown finish.
Flavor Enhancements and Variations
- Herbs and Spices: Consider adding a pinch of lemon zest or chopped fresh herbs (like rosemary or thyme) to the breadcrumb mixture for a burst of flavor.
- Spicy Kick: For a bit of heat, mix in a small amount of cayenne pepper or red pepper flakes into the dry ingredients.
- Cheese Variations: While Parmesan adds a wonderful tang, you can experiment with Pecorino Romano or even a sprinkle of mozzarella for a gooey twist.
Common Pitfalls to Avoid
- Overcrowding the Pan: Ensure the cutlets are in a single layer with space between them. Overcrowding can lead to uneven cooking and a soggy crust.
- Insufficient Coating: Don’t rush the dredging process. A well-adhered layer of flour, egg, and breadcrumbs is key to a crunchy finish.
- Oven Temperature: Make sure your oven is fully preheated to 400°F. An incorrectly preheated oven can result in undercooked or unevenly browned cutlets.
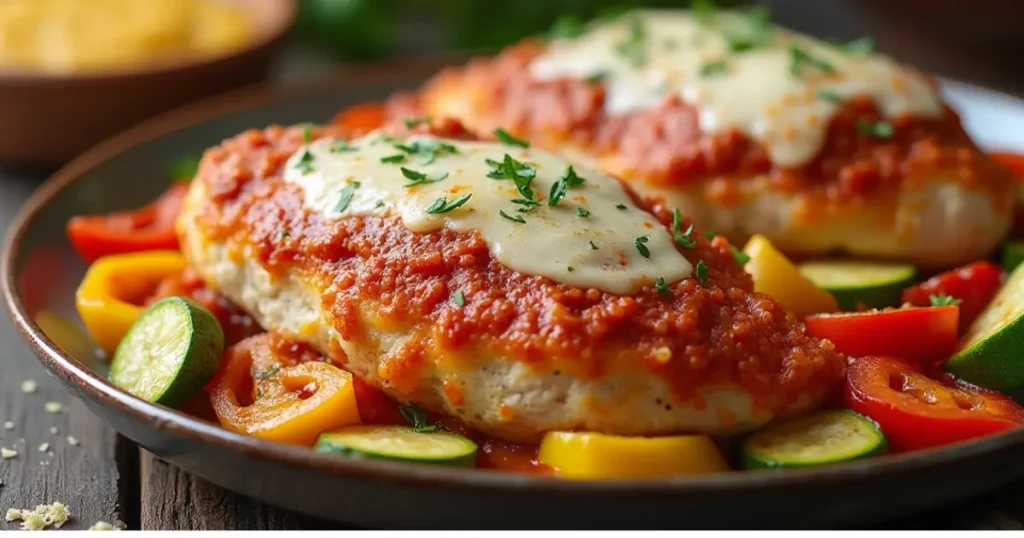
Serving Suggestions and Recipe Variations
Your perfectly baked chicken cutlets are incredibly versatile. Here are some ideas to serve them up in exciting new ways.
Serving Ideas
- Fresh Salads: Slice the cutlets and serve them over a bed of mixed greens with a tangy vinaigrette.
- Sandwiches and Wraps: Use the cutlets in a hearty sandwich or wrap with your favorite condiments, fresh veggies, and a spread of pesto or aioli.
- Pasta Toppings: Dice the chicken and toss it with your favorite pasta for a protein-packed meal.
- Dinner Plates: Serve whole cutlets with a side of roasted vegetables or mashed potatoes for a comforting, well-rounded dinner.
Recipe Adaptations
- Gluten-Free Version: Substitute all-purpose flour with a gluten-free flour blend and use gluten-free breadcrumbs.
- Different Proteins: You can easily adapt this recipe for turkey cutlets or thin pork cutlets with similar preparation and baking methods.
- Extra Saucy: Try drizzling a homemade tomato sauce or a light lemon butter sauce over the cutlets just before serving for an added layer of flavor.
Nutritional Information
While the exact nutrition may vary based on your ingredient choices, here’s a general idea:
- Calories: Approximately 235–250 calories per serving.
- Protein: High in lean protein, making it a great post-workout meal.
- Carbohydrates: Mainly from the flour and breadcrumbs, providing energy.
- Fat: Reduced fat content compared to traditional fried chicken, especially when using olive oil spray instead of deep frying.
Data/Sources: Consider linking to a nutritional calculator for precision, such as the USDA FoodData Central.
Conclusion
By now, you should feel equipped and inspired to make your own perfect oven-baked chicken cutlets at home. We’ve walked you through every step—from slicing and pounding the chicken to setting up a foolproof dredging station, baking to perfection, and even offering expert tips to enhance flavor and crunch.
Remember, cooking is not just about following a recipe; it’s about creating an experience that nourishes both body and soul. Whether you’re making this dish for a quick weeknight dinner, a meal prep plan, or a special family gathering, these baked chicken cutlets are sure to impress with their crispy exterior and tender, flavorful interior.
Now it’s your turn to get creative in the kitchen. Experiment with different spices, try new serving ideas, and share your delicious creations with us. If you have any tips or personal twists on this recipe, we’d love to hear from you in the comments below. Don’t forget to subscribe for more healthy, tasty, and easy-to-make recipes that will transform your dinner routine.
Call to Action:
Take a moment to try this recipe tonight, and once you do, share your results on social media using the hashtag #BakedChickenCutlets. Your feedback not only inspires us but helps fellow home cooks elevate their meals too!
Frequently Asked Questions (FAQ) – Baked Chicken Cutlets
How do I ensure my baked chicken cutlets stay crispy?
To maintain a crispy texture, always pat your chicken dry before dredging, use a wire rack for even air circulation, and lightly spray your cutlets with olive oil before baking. This method prevents moisture build-up and keeps the crust firm.
Can I make baked chicken cutlets ahead of time?
Absolutely! You can bake a batch of chicken cutlets and refrigerate them in an airtight container for 3-5 days. To reheat, place them in a preheated oven at 350°F for 10-12 minutes to restore their crispiness.
What internal temperature should the chicken reach?
For safe consumption, your chicken should reach an internal temperature of 165°F. Use a cooking thermometer to check the thickest part of the cutlet.
Are baked chicken cutlets a healthier option than fried chicken?
Yes, baking significantly reduces the amount of oil used in cooking, which lowers both the calorie and fat content of the dish. This makes baked chicken cutlets a heart-friendly and nutritious option without sacrificing flavor.
Can I substitute other proteins for chicken in this recipe?
You can adapt this recipe for turkey or pork cutlets. Keep in mind that cooking times may vary slightly, so ensure that the meat reaches the appropriate internal temperature for safety.
By following this comprehensive guide, you’re not only investing in a healthier, tastier dinner but also honing skills that will serve you well in the kitchen for years to come. Enjoy every step of the process, and remember: your perfect oven-baked chicken cutlets are just a few simple steps away from becoming a staple in your meal rotation.
Happy cooking, and here’s to many delicious and healthy dinners ahead!
If you enjoyed this tutorial and found it helpful, please leave a comment below or share your experience on social media. Your feedback drives us to create even more recipes and tips that make your cooking journey delightful and inspiring.