Now Reading: Banana Bread: An Easy Recipe for Moist, Delicious, and Simple-to-Make Treats
- 01
Banana Bread: An Easy Recipe for Moist, Delicious, and Simple-to-Make Treats
Banana Bread: An Easy Recipe for Moist, Delicious, and Simple-to-Make Treats

Table of Contents
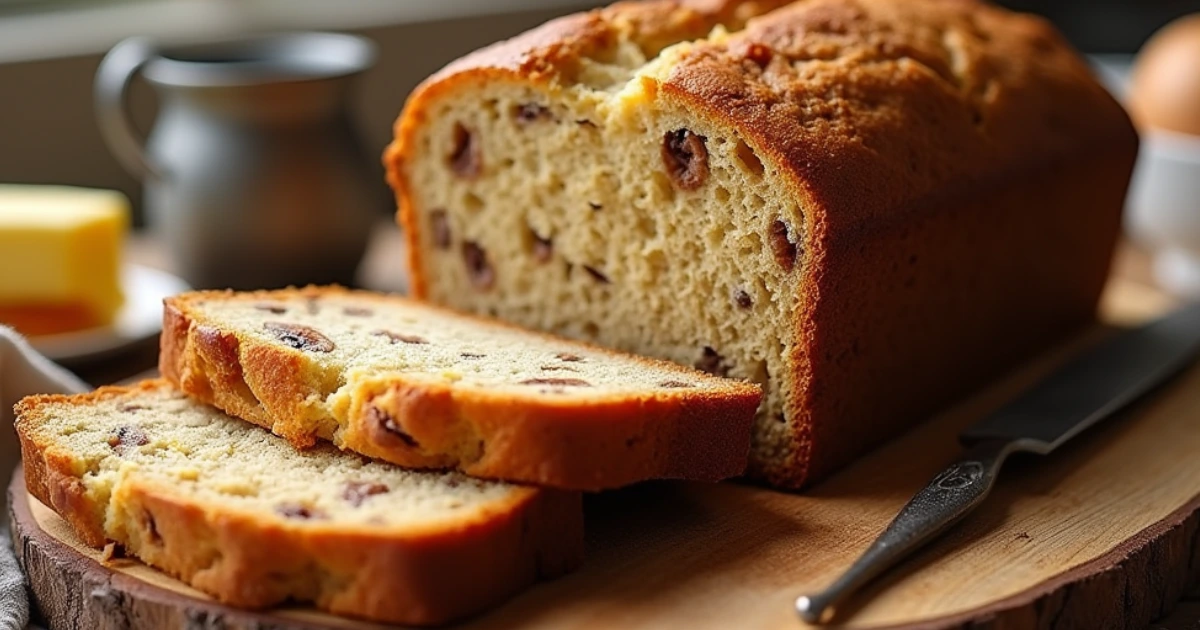
Imagine the aroma of freshly baked banana bread filling your kitchen—warm, inviting, and reminiscent of cozy family gatherings or lazy weekend mornings. Every slice of this classic treat holds a story: of laughter shared around the table, of cherished moments from your childhood, and of the simple joy that comes from baking something with love. This guide is designed just for you. Whether you’re an experienced baker or a beginner eager to try your hand at homemade delights, this comprehensive step-by-step guide will walk you through making moist, delicious, and utterly irresistible banana bread.
In this article, you will learn everything you need to know about crafting the perfect banana bread—from gathering the essential ingredients to mastering the mixing and baking techniques that ensure a tender crumb and golden crust. Let’s dive into a recipe that not only satisfies your sweet tooth but also fills your home with comforting warmth and nostalgia.
Introduction to Banana Bread
Banana bread is more than just a baked good; it’s a time-honored comfort food that has become a staple in many households. In your kitchen, it represents an accessible way to transform overripe bananas into a sweet, moist treat that can be enjoyed for breakfast, as a snack, or even dessert. The beauty of banana bread lies in its simplicity: a few common ingredients blend together to create a product that is both satisfying and versatile.
Why You’ll Love This Banana Bread Recipe
- Nostalgia in Every Bite: Remember the smell of banana bread at your grandmother’s house? This recipe will transport you back to those comforting days.
- Simple & Quick: With easy-to-follow instructions, you’ll have a delicious loaf ready in no time, perfect for busy mornings.
- Versatile Treat: Enjoy it plain, with a smear of butter or jam, or even toasted as a base for creative sandwich ideas.
- Healthy Indulgence: Made with natural ingredients, this banana bread can be a guilt-free treat that still satisfies your sweet cravings.
By the end of this article, you’ll be armed with all the knowledge you need to create a banana bread masterpiece that not only delights your taste buds but also becomes a new family favorite.
Essential Ingredients and Equipment
To achieve the perfect banana bread, you need the right ingredients and tools. Here, we break down everything you’ll require and why each component is crucial for success.
Must-Have Ingredients
When you embark on your banana bread journey, using quality ingredients is essential. Below is a detailed list of what you need:
- Overripe Bananas: The riper the bananas, the sweeter and more flavorful your bread will be. Aim for bananas with plenty of brown spots.
- All-Purpose Flour: Provides structure to your loaf.
- Granulated Sugar or Brown Sugar: Brown sugar can add extra moisture and a caramel-like depth of flavor.
- Eggs: They bind the ingredients together and help with the rising process.
- Butter (or Oil): Melted butter enriches the flavor and texture, but you can substitute part of it with oil for a lighter version.
- Baking Soda and Salt: These are your leavening and flavor-enhancing agents.
- Vanilla Extract: Adds a warm, aromatic quality.
- Optional Add-Ins: Consider incorporating walnuts, chocolate chips, or a dash of cinnamon for additional texture and flavor.
Recipe Ingredients Table
| Ingredient | Quantity | Notes |
|---|---|---|
| Overripe bananas | 3 large | Mashed thoroughly |
| All-purpose flour | 2 cups | Sifted for a lighter texture |
| Granulated/Brown sugar | 3/4 cup | Brown sugar adds extra moisture |
| Eggs | 2 large | At room temperature |
| Butter | 1/2 cup | Melted (or substitute with oil) |
| Baking soda | 1 teaspoon | Leavening agent |
| Salt | 1/4 teaspoon | Enhances flavor |
| Vanilla extract | 1 teaspoon | For aroma and depth |
| Optional Add-ins | As desired | Walnuts, chocolate chips, cinnamon |
Necessary Equipment
To ensure your banana bread turns out perfectly, gather these essential tools:
- Mixing Bowls: Large and medium-sized bowls for mixing your ingredients.
- Fork or Potato Masher: For mashing the bananas until they reach the desired consistency.
- Whisk: To beat eggs and sugar together, ensuring a smooth mixture.
- Loaf Pan: A standard 9×5-inch loaf pan works best for even baking.
- Spatula: For folding ingredients gently into the batter.
- Cooling Rack: To allow your freshly baked bread to cool evenly without becoming soggy.
Having all your ingredients and equipment ready before you start will make the process smoother and more enjoyable.
Step-by-Step Banana Bread Recipe
Now that you have your ingredients and tools, let’s move on to the process of creating your moist, delicious banana bread. Follow these detailed steps to ensure your success.
Preparing Your Ingredients
1. Mash the Bananas
- Step 1: Peel your overripe bananas and place them in a large mixing bowl.
- Step 2: Use a fork or a potato masher to mash them until mostly smooth. It’s okay to have a few small lumps for texture.
Key Tip: The riper your bananas, the more natural sweetness they provide. This step is essential for achieving that signature moistness.
2. Sift Dry Ingredients
- Step 1: In a separate bowl, sift together the all-purpose flour, baking soda, and salt.
- Step 2: Sifting helps to aerate the flour, ensuring a lighter, fluffier loaf.
Mixing the Wet Ingredients
1. Beat the Eggs and Sugar
- Step 1: In another medium-sized bowl, beat the eggs together with the granulated (or brown) sugar.
- Step 2: Continue whisking until the mixture becomes light and frothy, which helps incorporate air and improves texture.
2. Combine Butter and Vanilla
- Step 1: Slowly mix in the melted butter and vanilla extract into the egg and sugar mixture.
- Step 2: Ensure the mixture is well combined but do not overbeat.
Combining the Mixtures
1. Fold in the Dry Ingredients
- Step 1: Gradually add the sifted dry ingredients into the wet mixture.
- Step 2: Gently fold the mixture using a spatula until just combined. Overmixing can lead to a dense texture.
2. Incorporate the Mashed Bananas
- Step 1: Pour in your mashed bananas and mix them into the batter.
- Step 2: If you’re adding any optional ingredients like walnuts, chocolate chips, or cinnamon, gently fold them in at this stage.
Pouring and Baking
1. Prepare Your Loaf Pan
- Step 1: Grease your 9×5-inch loaf pan thoroughly with butter or non-stick spray.
- Step 2: Alternatively, line the pan with parchment paper for easier removal.
2. Pour the Batter
- Step 1: Transfer the banana bread batter into the prepared loaf pan.
- Step 2: Use a spatula to smooth the top, ensuring even baking.
3. Bake the Banana Bread
- Step 1: Preheat your oven to 350°F (175°C) if you haven’t already.
- Step 2: Place the loaf pan in the oven and bake for 60–70 minutes.
- Step 3: Check for doneness by inserting a toothpick into the center; if it comes out clean or with a few moist crumbs, it’s done.
- Step 4: If the top starts to brown too quickly, tent it with aluminum foil during the final 10–15 minutes of baking.
4. Cooling
- Step 1: Once baked, remove the loaf from the oven and let it cool in the pan for about 10 minutes.
- Step 2: Transfer the bread to a cooling rack to cool completely. This step is crucial to prevent the bread from becoming soggy.
Expert Tips and Variations
Enhance your banana bread experience with these additional tips and creative twists:
Tips for Perfect Banana Bread
- Avoid Overmixing:
- Mix until the ingredients are just combined to maintain a tender crumb.
- Room Temperature Ingredients:
- Ensure your eggs and melted butter are at room temperature for a smoother batter.
- Proper Pan Preparation:
- Grease or line your loaf pan well to prevent sticking and to make removal easier.
- Test for Doneness:
- A toothpick inserted in the center should come out clean or with a few crumbs.
Creative Variations
- Healthier Twist:
- Replace half the butter with applesauce to reduce fat while keeping moisture.
- Use whole wheat flour in place of all-purpose flour for added fiber.
- Flavor Enhancements:
- Add a teaspoon of cinnamon or a pinch of nutmeg for warm, spiced notes.
- Stir in a handful of chopped nuts like walnuts or pecans for crunch.
- Extra Treats:
- Mix in chocolate chips for a delightful, sweet surprise in every bite.
- Swirl in a layer of cream cheese before baking for a marbled effect.
Common Mistakes to Avoid
- Overmixing:
- This can lead to a dense, rubbery texture.
- Using Underripe Bananas:
- They won’t provide enough natural sweetness or moisture.
- Skipping Preheating:
- Always preheat your oven to ensure even baking from the start.
Bullet List Recap:
- Mash ripe bananas thoroughly.
- Sift dry ingredients for a light texture.
- Beat eggs and sugar until frothy.
- Gently combine wet and dry mixtures.
- Pour into a well-prepared loaf pan and bake at 350°F for 60–70 minutes.
Serving Suggestions and Storage
Your delicious banana bread is best enjoyed in ways that suit your lifestyle and preferences. Here are some ideas to help you serve and store it for maximum enjoyment.
Serving Suggestions
- Warm and Fresh:
- Serve a slice of banana bread warm from the oven with a pat of butter or a drizzle of honey.
- As a Breakfast:
- Enjoy a slice toasted with your favorite jam or nut butter alongside a hot cup of coffee or tea.
- Snack Time:
- Pair with a glass of milk or a smoothie for a satisfying snack that keeps you energized.
- Creative Uses:
- Use banana bread as the base for a decadent French toast or even a bread pudding for a unique dessert twist.
Storage Tips
- Room Temperature:
- Wrap your banana bread tightly in plastic wrap or foil and store at room temperature for 2–3 days.
- Refrigeration:
- For longer storage, keep the bread in an airtight container in the refrigerator for up to a week.
- Note: Refrigerated banana bread may dry out; let it come to room temperature or warm it slightly in the microwave before serving.
- Freezing:
- Slice the banana bread and freeze individual pieces in freezer bags for a quick and easy treat later.
- To reheat, thaw overnight in the refrigerator and warm in the microwave for 10–15 seconds.
Quick Tips List:
- Wrap tightly in plastic wrap.
- Use an airtight container for refrigeration.
- Slice before freezing for convenient portions.
Frequently Asked Questions (FAQ) about Banana Bread
FAQ Section Featuring “Banana Bread”
- Q: Why is my banana bread too dense?
A: Density often results from overmixing or using under-ripe bananas. Make sure your bananas are very ripe and mix the batter just until combined. - Q: Can I use oil instead of butter?
A: Yes, you can substitute a mild oil like canola for butter. The texture may vary slightly, but the bread will still be moist and delicious. - Q: How do I know when my banana bread is done?
A: Insert a toothpick into the center; if it comes out clean or with a few moist crumbs, your banana bread is perfectly baked. - Q: What optional add-ins work best in banana bread?
A: Popular choices include walnuts, pecans, chocolate chips, and a sprinkle of cinnamon. These add texture and extra flavor. - Q: How should I store leftover banana bread?
A: Wrap it tightly in plastic wrap and store at room temperature for up to 2–3 days, or refrigerate for up to a week. Slicing and freezing is also an excellent option for longer storage.
Conclusion
By following this comprehensive guide, you now have everything you need to create a moist, delicious, and simple banana bread that will delight your senses and warm your heart. From the careful selection of overripe bananas to the precise mixing and baking techniques, every step is designed to ensure that your banana bread turns out perfectly every time.
Not only is this recipe straightforward, but it also allows you to add your unique touch with various creative variations. Whether you prefer a classic loaf, a nutty twist, or a chocolate chip-infused delight, this banana bread recipe is versatile enough to suit your taste.
Now, it’s time for you to step into your kitchen, gather your ingredients, and embark on a baking adventure that promises not only a delectable treat but also the satisfaction of creating something homemade and heartwarming. Enjoy the process, experiment with flavors, and most importantly, share your delicious creations with friends and family.
Call-to-Action:
If you found this guide helpful and are excited to try your hand at making banana bread, leave a comment below sharing your experience, tips, or even photos of your baked masterpiece. Subscribe to our newsletter for more easy-to-follow recipes and culinary tips that will inspire you to create extraordinary meals in your kitchen. Don’t forget to share your banana bread journey on social media with the hashtag #BananaBread—we love to see your creations and celebrate your successes!
Happy baking, and here’s to many more delicious moments in your kitchen!
By following this detailed article, you’re well-equipped to create a timeless classic that combines comfort, flavor, and simplicity. Enjoy every step of your banana bread journey, and relish in the sweet rewards of your hard work.


